Quoting Jobs Understanding your true cost and estimating
2 Comments
As some of you may know, I recently did a poll in a couple well known groups.
This poll was about how people buy spray foam. In this poll I started off with three options:
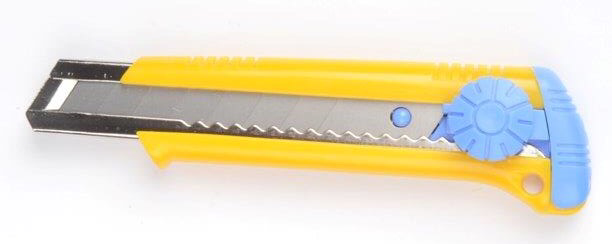
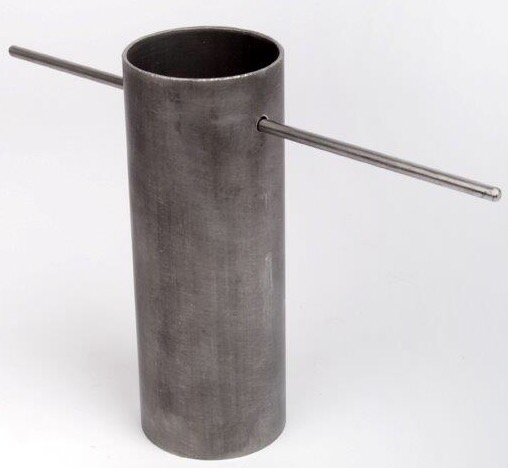
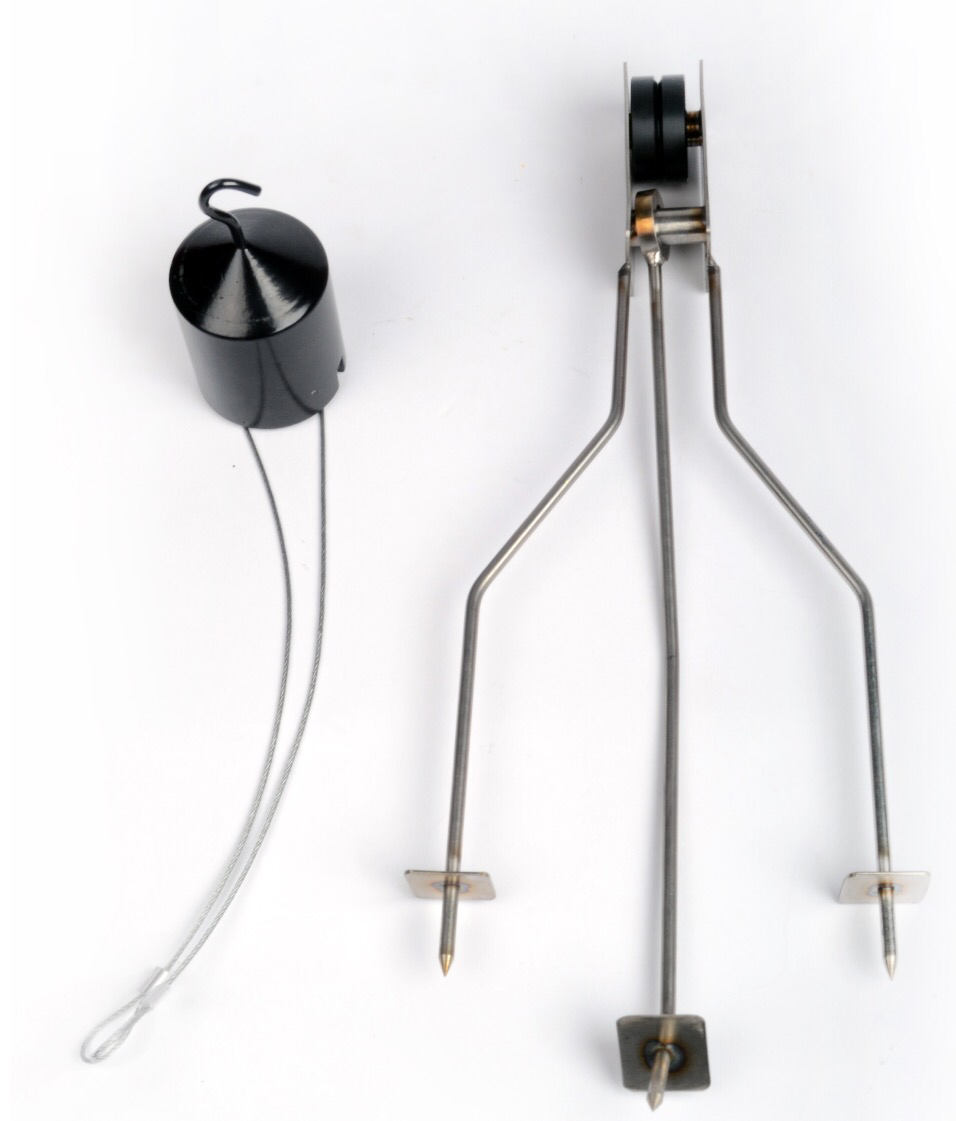
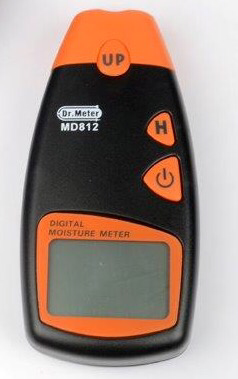
What really surprised me was how many people buy product by pounds and by set price. I get that it makes it easy to get a price that you can easy check when it comes to an invoice, but that number shouldn't be all you guys look at. Companies that only focus on these two number may be leaving a lot in the table. Just because you don’t see price per board feet on any invoices, that doesn’t mean you shouldn’t be concerned about it when purchasing. Everyone always says they want yield and sprayability, but the two numbers ( set price and lb price) have nothing to do with either of those things. Knowing you can get a repeatable board footage you get from a set will allow you to figure out sprayability and yields. If that’s what you care about so why not buy based on that? We all know the number games some chemical reps always seem to play. They promise the best yields and they promise the easiest foam to spray. Everyone hears this so much, no one believes it anymore and just cares about set price and lb price. So what is a company to do, so they can make sure they can get the best bang for their buck? Simple. Try out lots of products and see what works for you. What you should always be looking to see what kind of board footage YOU are seeing in the real world, as well as how easy it is for YOU to repeat that board footage. Once you find a product where you see constant yields you now have something you can work with. I’d recommend something like 10 sets to get some decent experience with the product as well as some good numbers for true yields. From there you can find out an average of what your board foot price is per set. This should be that number you are most concerned about! To explain why this number is more important than the other two numbers, let look at two examples. From the groups I see a lot of people claiming around 4200 board feet as well as 5000 board feet. Let’s use these numbers and see how board foot price compares to the set and lb price. Example 1 - Per Set Price Set 1 - 4200 bdft at a cost of $2350 per set To figure out the board foot (yield) price, it’s simple. Set price / yield = board foot price. So with that being said... $2350/4200 = $.56 a board foot. Set 2 - 5000 bdft at a cost of $2700 per set Using the same formula from set 1... Set price / yield = board foot price. $2700/5000 = $.54 a board foot. Set price Conclusion From seeing these number we can see that a set which averages 5000 board feet per set at a price of $2700 is actually cheaper that a set that averages 4200 board feet at a price of $2350. When you account for the $.02 saving per board foot, you would actually be putting $100 back in your pocket every 5000 board feet sprayed, in material costs alone, if you bought the more expensive set. Don't forget, what you profit off that extra 800 board feet all goes into your pocket. Example 2 - Per Pound (kilo) Price For easy numbers I’ll use 1000 lb sets for comparison. To figure out the these numbers we need to take the lbs (kilos) and see how much a set would cost at that price, once again the math is simple. $lbs or $kilos X lbs per set or kilos per set = set price After we figure out the set price we can use the formula from example 1 to see or board foot costs Set 1 - 4200 bdft at a cost of $2.35 per lb ($5.17 per kilo) Pound math $2.35 x 1000 lbs = $2350 per set Or Kilo math $5.17 x 454 kilos = $2350 per set Now the board foot price $2350/4200 = $.56 a board foot. Set 2 - 5000 bdft at a cost of $2.70per lb ($5.95 per kilo) Using the same formulas from set 1... Pound math $2.70 x 1000 lbs = $2700 per set Or Kilo math $5.95 x 454 kilos = $2700 per set Now the board foot price $2700/4200 = $.54 a board foot. Pound price Conclusion From seeing these number we can see that a set which averages 5000 board feet per set at a price of $2.70 per lb ($5.95 per kilo) is actually cheaper that a set that averages 4200 board feet at a price of $2.35 per ($5.17 per kilo). Once again when you account for the $.02 saving per board foot, you would actually be putting $100 back in your pocket every 5000 board feet sprayed. Not to mention the extra money you profit off the extra 800 board feet. Overall example conclusion Buy using these formulas, will not only be putting the extra material costs back in your pocket, but when you look at the extra board footage you get per set that’s just extra profits. If you sold your jobs at $1 a board foot, these examples you give you an extra $800 per set difference. So if you can get an extra $800 per set by spending an extra $350 why wouldn’t you? That’s a total of $450 extra ($800-$350=$450) per set you would make! Knowing your true board footage will not only help you buy the best product for you, but it will prevent you from leaving money on the table! It’s also a great way to set a base line to start comparing two materials. Now that we know how we should be buying using dollars and cents, it’s important to remember the “extras” that come with buying the products. Even though some products may give the same yield, it’s behind the scenes stuff that can make a huge difference. Keep in mind to remember nothing is free in life. Only you can put a price in how important sprayability, free tech support, good tech support, free training, great customer service, availability, distributors storage, R-value difference (higher r values means you use less material per job)... In my opinion that type of stuff is definitely worth a few cents more per board foot. For the simplicity alone. Remember everything has a price, so you will always pay now or pay later. Rex Tailor Let's talk Chamber size, and put all egos aside.
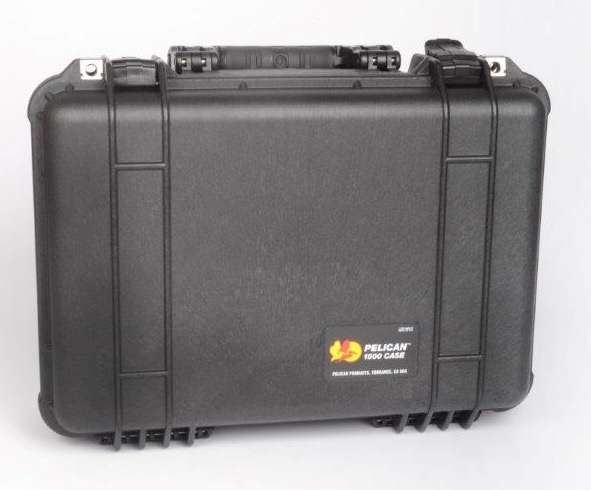
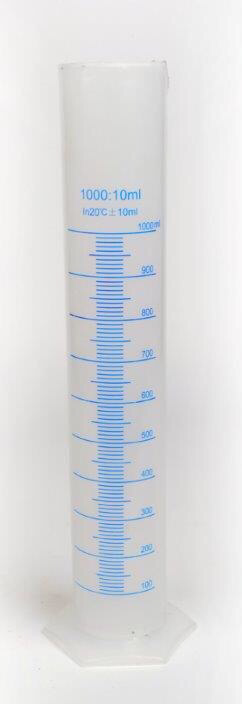
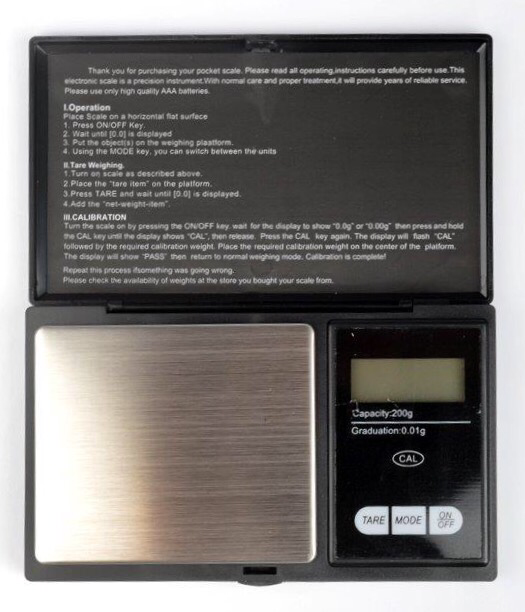
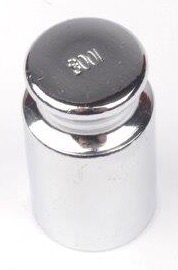
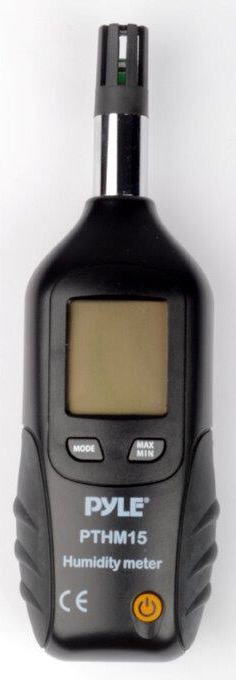
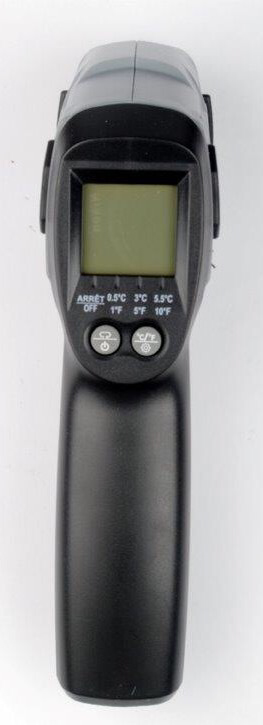
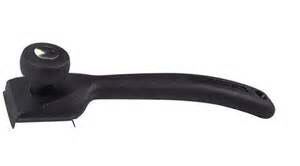
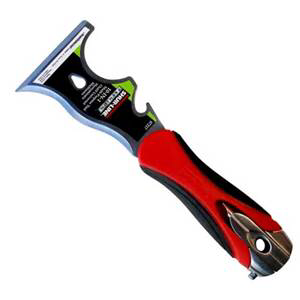
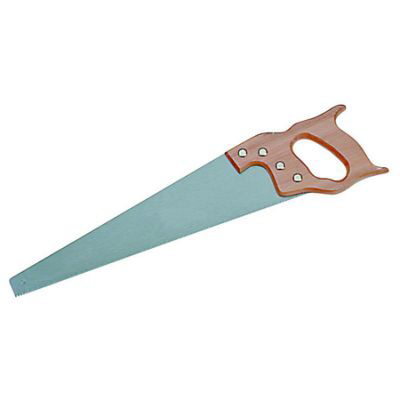
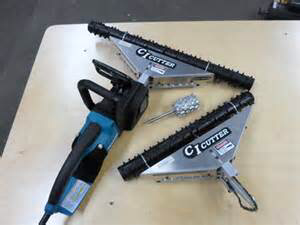
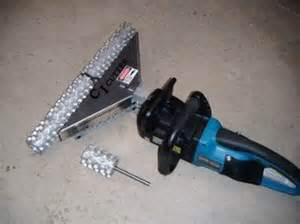
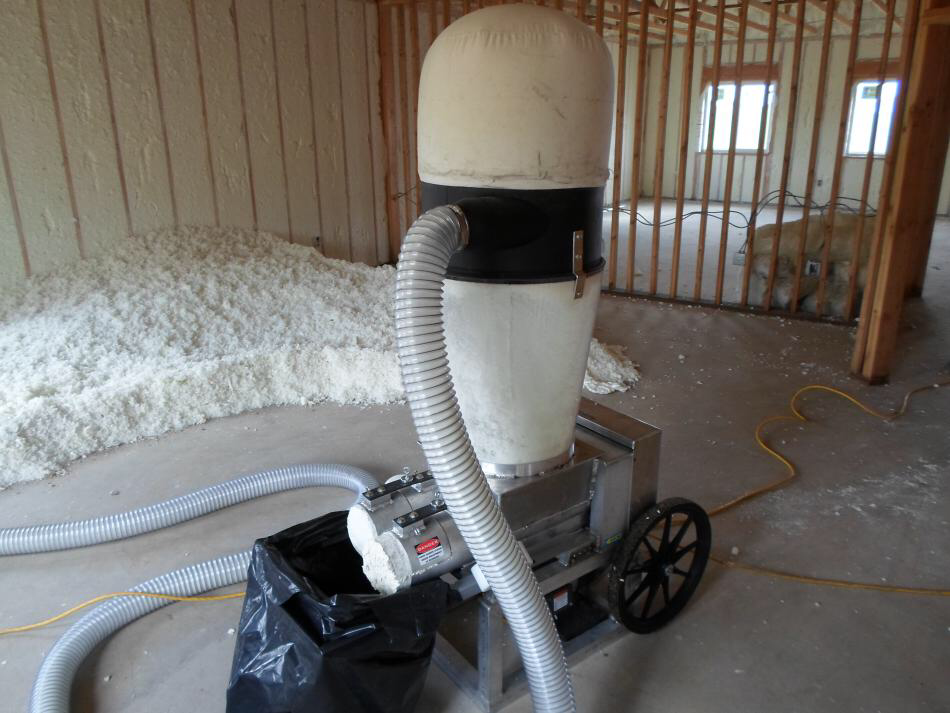
Chamber size always seems to be a great topic to get people talking. Everyone is always interested in what chamber everyone else is using, and where they use them. Unlike somethings guys tend to compare, bigger isn't always better, and yes it's how you use it that determines how good the finished job is. When spraying foam it is all about control, and speed. If you have great gun control, you can still mess up a job because you don't move fast enough. If you are moving so slow, you will never get into your rhythm, no rhythm means no consistency. Moving too fast wears a person out and can create long term issues with your arms, elbows and wrists. That's why there are so many different chamber sizes out there. I'm guessing half of the people out there right now are proud saying they use 02 or 52 chambers for everything. If you can control them in a stud cavity amazing, but I bet you are moving pretty fast, and worn out by the end of the day. Or your jobs are not always as smooth as you would like them, and your helper hates you because of all of the over spray. Where on the other hand some of you use smaller chambers because you love the smooth glass look and are proud you never have to scrap a stud. Putting aside all egos, you are both right. But there is a happy medium where you can use speed, control, get great yields, not wear yourself out, AND not have to spend hours cleaning up after a job. All chambers have a time and place. Throughout this I'll talk about the AR29, AW39, AR42, AR47, AR52 and the whopping AR60 chambers. Let's start with the AR42 chamber. This is a great chamber it's the most popular for a reason. This chamber has an output of 9lbs a min, and will give you a spray pattern of 11 inches across (when spraying 18 inches from the substrate). 9lbs a min is a good output for the average person. It allows them to spray 16 inch stud cavities with control, at a speed that won’t blow out your arms. Once you get familiar with it, It will allow you to lay 2 inches pretty smooth within stud cavities. The AW39 chamber has the same output as the AR42 but it has a wider spray pattern. The 39 chamber sprays a pattern 16 inches wide. Some people really like this tip for spraying stud cavities. You can’t just go straight down the cavity, but with a little flick of the wrist you can fill the cavities. Some people find it less labour intensive than using an AR42 chamber. For some people they find the output of the 42 or 39 chambers a little too much. Most of the time it’s because they like to be picky with their work (100% nothing wrong with that at all!) and want it to look smoother. That’s where the AR29 chamber comes in. The 29 chamber has an output of 7lbs a min (not all that much less) and a 7 inch pattern. The smaller output and smaller pattern will allow much more control over your spraying and also allow you to feel more relaxed and not rushed while trying to lay the foam in nice and consistent. You will sacrifice a little bit of time using this chamber but the extra control you get will reduce wasted material as well as clean up time after! This chamber is also popular for spraying coatings. Now the second most popular chamber is the AR52 chambers. These chambers have some nice output which can make them a little hard to control. Their output is 14 lbs a min and has a pattern of 12 inches wide. The spray pattern size can make it nice to fill in between studs, but the output can make it very difficult to maintain a 2 inch pass. These chambers are very popular with 1/2 lb Foam since there isn’t really a pass thickness for that system. But when it comes to 2 lb foams, they tend to be a bit much for stud cavities. Where they work well when using 2 lb foams is on open walls, roof decks and floors. It allows you to do nice wide passes and build up your two inch lifts quite nicely. When used for stud cavities the speed you need to move to lay the foam down nicely often makes it hard to control where the foam ends up, causing waves or even mountains in your foam, not to mention all over the studs. To help achieve the extra output, but still have some control the AR47 does a great job! It has an output of around 11.5 lbs a minute with a pattern width of 11 inches. This is a nice fit for the guys that need a little extra over the AR42, or the AW39 chambers. If provides a little extra speed, but with a little more control. 9 lbs a minute to 14 is a big jump when trying to get comfortable with a chamber. That just leaves the beast of a chamber left, the AR60. This monster of a chamber has an output of 19 lbs a minute and a width of 14 inches. This guys should only be used with a big machine as well as in large wide open surfaces, such as roofing, or stabilizing large pipelines. Most of the time it’s used with 3lb or pour foam systems. The last thing I want to point out for everyone is how long it would actually take to spray an entire set of material (1050lbs worth), if you held the trigger down until the set was empty, no triggering or anything! AR29 would take about 150 minutes AW39 would take about 116.66 minutes AR42 would take about 116.66 minutes AR47 would take about 91 minutes AR52 would take about 75 minutes AR60 would take about 55 minutes Laid out like that you can easily see why people would tend to jump from a 42 chamber to a 52 chamber, as well as why the 47 was recently created! Yes the 52 chamber will be able to put a set of material on the wall faster, but if it creates more than 26 minutes of extra clean up time is it really worth it to give up the control of the 42? That extra clean up time is not only time, but it’s scraping product which is being purchased to be thrown out, not to be sold! This is why people tend to say they get better yields with smaller chambers. If you are a Canadian spray foamer, you know about Spray foam density test kits. Or should at least. According to the Can/ULC s705.2 standards (rules for spraying foam in Canada), every time the date changes, job site location changes, or batch number on a supply drum changes, certain tests MUST BE COMPLETED! These are simple tests which take little time, but verify the quality of the foam being installed. All the test results, as well as environmental conditions, must go on a Daily work sheet. If you are from another country, besides Canada, please don't stop reading. This can information will help set you and your company apart from others around you, adding credibility, quality and financial gains to your organization. Credibility: By filling out daily work sheets, you have the opportunity to provide your customers with paperwork stating testing on the foam installed in their house has been completed, as well as the results from these tests. Most potential customers are aware of the negatives that which may occur during the spray foaming process. As long as you can address the negatives in a positive way, you can use them in your advantage. Everyone knows that if its not applied correctly a various negative things can happen. Why not tell the home owner that once the job is over you will have over a sample of the foam, along with a report saying the tests resaults proving it has passed? It will make them feel confident the job was done correctly. By doing this, you reassure them that their "dream home" will not turn into a "nightmare home" just because they hired the wrong company to apply the insulation. Everyone loves reassurance when doing something "big". Quality: By doing these tests it possible to prevent high density foam from being applied, potentially spotting adhesion/cohesion issues, as well as poor cell structure (cell structure is a totally different rant, I'll save it for another time). Financial gains: There are many ways these test can provide financial gains. One of the obvious ones come from being able to notice high density foam before you spray an entire job (hoping you make the correct changes to bring it back to normal). The difference in profits from a set of foam being sprayed at 2.5 lbs per cubic feet compared to a set being sprayed at 2.0 lbs per cubic feet is $1200 (assuming you sell it for $1 per board foot). Another way to see financial gains from this testing is by proving credibility as well as quality. This allows customers to see your value over your competition. Extra value equates to being able to charge slightly more for your work. This means instead of charging $1 a board foot, you can potentially charge $1.05 a board foot. Doesn't sound like a lot, but on a 10,000 sqft job that's an extra $500. Over the year that can add up! Hopefully by know you can start to see the advantage of doing daily work sheets, as well as testing the foam on every job. So now let's move on to what these test are as well as what tools are need for each one. What's in a test kit?1) Protective case - After spending all this money on testing equipment, you want to keep it safe right? 2) 1000ml Graduated Cylinder - used to fill up with water for the density tests 3) Digital Scale (measure in grams to 2 decimal points) - used to weight out samples 4) 100g scale - used to verify accuracy of digital scale 5) Calculator - used to do all the "complicated" math 6) Knife - for cutting samples. Ones like this with the long blades makes it easier to cut samples. 7) Coring tool - used for isolating sample for adhesion/cohesion tests 8) Pull tester or tripod with 1000g weight (CUFCA style) - used for adhesion/ cohesion tests 9) Moisture meter - to test moisture content in substrate (must be less than 18%, otherwise adhesion issues may occur) 10) Hygrometer - measures ambient temperature as well as relative humidity, in your spray area (you shouldn't spray if relative humidity is greater than 80%) 11) IR gun - interred temperature gun, used to take substrate temperatures as well as mete rial temperatures. What are the two type of tests? The first test is a density test. Obviously this test will tell you the density of the foam you are applying. You can do this for both open cell and closed cell foams. Although it's two different techniques. Let start with the closed cell test You will need the following devices: 1000ml Graduated Cylinder Digital Scale (measure in grams to 2 decimal points) Calculator Knife To preform a density test you will need to cut a sample of foam (preferably from a cavity you sprayed). Your sample should weigh at least 5.5 grams and smaller than 8.5 grams. It must also be skinny enough to easily fit into your graduated cylinder. When cutting your sample piece remove both the top and bottom skins. Try to cut at least 1/4 or so away from the surface. Your idea sample will: Have zero pass lines through it No tearing of the foam (from cutting with a dull blade) Will not be crushed in any way Between 5.5 and 8.5 grams. Next fill the cylinder with 500 ml of water. It doesn't have to be exact, but it's critical that you know how much you start with. Now you must totally submerge the sample in the water, you want it to be just under the water surface. Take note of the change of the water level. Record this number. To find the density take the weight of the sample, divide by how much the water level increased and then multiple that by 62.4. The formula looks like : (grams/water change) * 62.4. That will give you your density per cubic foot. Next the open Cell test. To preform a density test with open cell foam, you will need to cut out a section which you can easily measure the height, width, and depth of (4 inch cubes moe nice samples). After you have the sample all measured up, you will need to find the weight in grams. Once you have this information, you will take the weight and multiple it by 3.81. Next take that answer and divide it by the volume of your sample (length x width x height). The formula looks like : (grams x 3.81) / volume This will give you your density per cubic foot. The second test will be the adhesion test. To complete this test, you will need the following devices: Coring tool (70 mm) Puck with a hook Knife Pull tester (or tripod with 1000 gram weight ) Epoxy (or wet spray foam) In order to test adhesion you will want to find a nice spot of foam (which is attached to the substrate). Next you will need to take the coring to and with a twisting motion cut the foam right down to the substrate. This will create a nice 70mm "foam island" which is attached to only the substrate. Be careful when removing the citing tool. It's best to twist is while slowing pulling it back. If you are too aggressive, you will break your sample. Next you want to adhere the puck (with a hook in it) to your nice "foam island". You can do this with epoxy, or simple give the back side of the puck a quick shot with foam, and quickly hold it in place until it hardens up. If there is any foam or epoxy that leaked past use your knife to cut it all off. Now you should have a nice "foam Island" with a hooked puck glued to it. The next step is the actual test itself. If you are using the pull testers (make sure you zero it out), simply hook it to the hook centered in the puck and pull back until it reaches 1000 grams (2 lbs). If you can do this with out the sample pulling off the wall, you have passed the adhesion test! If you are using the tripod, simply set it up so the hook on the puck is centered between the top two prongs. Next take the wire and connect one end to the puck, and the 1000 gram weight to the other end, and lay the wire around the wheel, letting the weight hang. If you can do this without the sample pulling off the wall, you have passed the adhesion test! If you used spray foam to glue the puck to the sample, you have actually done another test at the same time. You were able to check cohesion a as well (that's how good the foam sticks to itself). You can also check cohesion by finding a spot, to sample, where you have applied more then one pass. If you have any other questions or comments, please ask away! Thanks for reading, Rex Tailor In the last little while, I've been getting a lot of emails about "what's the easiest way to clean foam after a job". There are a lot of things out there that look fancy and some expensive toys you can buy, but are they really worth it? In my opinion, this is a case where sometimes the simple things in life and a little effort are the easiest. It all boils down to what you want to clean up and how much is there. Whenever cutting back foam, always keep in mind where wires are. It's easy for the expanding foam to push wires out past the studs. If you are not careful, these wires are easily cut. The more aggressive cutting you do, the easier these accidents happen. With places being built with more and more technology, imagine what it would be like to try to repair a fibre optic cable, because it get damaged rushing a cleaning up! Paint Scrapers If you are an experienced sprayer, with good gun control (and proper sized chambers), you should be able to control the foam to the point where you are not over filling cavities (using closed cell) and get a minimum amount of over spray on your studs. Also try using our "TAILORMADE"TM adjustable end cap on your gun to not over fill cavities. In this case a simple two handed paint scraper (or a single handled flat blade) is the cheapest, easiest and a quick way to clean them. Simply run it up and down the stud and everything just falls off. Thicker spots you may have to use a little more elbow grease, to get clean. Ice Scrapers Just like the paint scrapers, ice scrapers are great for scraping studs. They come in handy when for taller walls, and ceilings. When scraping walls they can prevent you from having to use ladders and steps, speeding up your clean up time, as well as saving you legs a little from constantly going up and down steps. When end it comes to ceilings, you will still need steps, or a ladder to get the right angles, but the reach of them will minimize the number of times you have to go up and down steps! Hand Saws When cleaning off open cell foam they easiest thing to use is a simple hand wood saw, with the teeth all grinded off. This will create something that resembles a large razor blade. Getting a saw that is at least 18 inches wide will allow you to cut through a full 16 inch cavity and make it nice and flat. Using the saw will make clean up easy as well. The pieces you cut off will be nice big size pieces, easy to pick up, which drastically reduces your clean up time. Saws like this can also be used for closed cell foam, but it will definitely be harder to do. For this you want to make sure it's as sharp as possible! CI Cutter If you are the type of person that wants the fancy toys, a CI cutter is for you. These cutters are basically a knobby metal wheel, attached to an electric chainsaw! These make cleaning off either closed cell or open cell foam (there are two different wheels for it, one for open cell and one for closed cell) extremely easy. Turn it on and watch the knobby wheel spin, then watch whatever foam you don't want disappear as soon as you touch it. This sounds simple and amazing, but it does have a three major drawbacks (for most people) 1) The price - I'm sure once I started describing it you can see that it's not cheap. It's an electric chainsaw with a custom made head, and wheels that were designed just for foam removal. Anytime you have custom parts, it's expensive. You will be looking at a couple to a few thousand dollars for something like this (depending on where you live). 2) Clean up - as you can imagine, the piece which this breaks the foam into are not very large. These small pieces fly everywhere. These pieces can get a static charge to them, which causes them to stick everywhere. It may take little time to shave everything off the walls, but you can spend hours after trying to clean up all of the foam dust you create, make this whole process a lot easier, but taking longer to complete. 3) The Weight - for the average person this is a heavy tool. For someone to constantly lift and lower the tool, it can be tiring to work with. The weight of it is probably around 30 lbs. That doesn't sound like a lot, but pick it up over your head and put it down to the ground 100 times and your arms probably won't like you any more. CI Vac-Pac The CI Vac -Pac is a great toy, which makes clean up a lot easier (especially if you use the CI Cutter)! this machine is a vacuum that compresses all your waste into small pucks. If you have ever cleanedup an open cell job site, you know how much space all the scraps will take up. They can easily fill the back of your trucks. This fancy toy allows you to vacuum up the jobs sites, and it compresses all that's waste into little pucks, which take up not a lot of space. You can literally take a truck full of waste and reduce it down to a regular sized garbage bag. The down side to this of course is the price. This kind of convenience doesn't come cheap... It's going to cost more than the average person wants to spend! If your main business is spraying open cell foam, it might be worth saving up for though! What do I do when I get over spray where I don't want it?
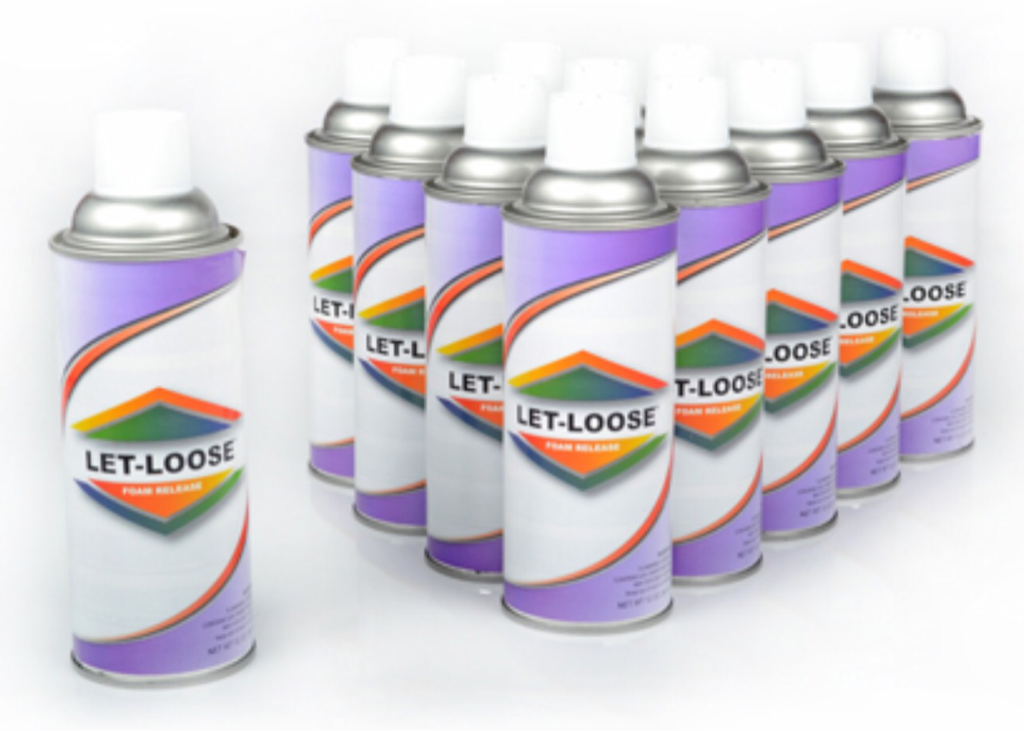
The easy answer is simply, don't do it! Once the foam sticks to something, it always leaves a small stain, which will turn orange once exposed to daylight (uv Rays). Using poly to cover up things that can not be removed from a room is the best way to do this. If you have furnaces and window frames that are made of metal and are hard to cover, you want want to spray them down with some type of spray foam release, products like Cortez's LET-LOOSE spray foam release works perfect for stuff like this, as well as visors on masks, or really anything you do not want foam to stick to. BUT let's say it's past this point and you have already got foam where it shouldn't be... If its on glass. Time, elbow grease, and a brand new razor blade is the best way. If it's on metal sheeting, or railings... try to paint it, or replace it. If it's on brick or concert, wire brush works good. If it's on cars..you can try clay bars if it's not a lot. If it's bad, then major detailing will come into play. Basically, removing the last layer of clear coat, and then reapplying it. Yes it gets pricey. If it's on shingles, you can try to scrap them off, but chances are you will be replacing it. If it's on a painted surface, sand it down and repaint it. These are the common issues installers run into, and the most common ways to correct them. If you noticed, most of the time it ended up with something being replaced. If anyone has anything else that works well for them, please feel free to share it in the comment sections! With so many machines and so many different systems out there how do you know how to set your system yo for the best results. There are a few different theory's out there with how a machine should be set up, one thing that is consistent with the theories is how to get the temperature set correctly. When you pull the trigger you want to see a nice round pattern (depending on your chamber). When the material hits the substrate you want to see it look "wet" for about a second. After the second of wet looking material you should see it change color (to the finished shade) as well as rise up. If the material is wet for longer than a second, or the pattern doesn't open up fully, that is a sign of cold material. Cold material will drop down walls creating a messy finish. It will also will not expand the same as properly heated materials. This will cause poor yield, as a result of higher density. On the other hand, if the material comes out too hot, it will hit the substrate the same shade and color of the finished product. This is because the foam is reacting before it ever touches the wall. This will cause a lot of extra over spray as well as damage cell structure allowing shrinkage and cracking to occur much easier. Once again your finished product with look rough and terrible, because the foam does not have time to "grow into itself" and create a nice smooth skin. Another thing you will notice is how hard it is to keep a good pattern. This is because the chambers will plug up much faster, because if the early reaction time. Typically this temperature range will be between 100-140 F. Talk to you chemical manufacture to be able to get a smaller range. Now that you have your temperature range dialed in. This is where the theories come into play. Theory #1 ISO temperature slightly lower than the others RESIN temperature is roughly 10 degrees f hotter than the ISO HOSE temperature is in the middle This setting was created to help your gauges look more balanced. The science behind this is true, and proves the pressure will be more balanced. Because the two materials have different viscosities at room temperature, when they are heated up, the resin is will remain slightly thicker. This will create more back pressure. By increasing it 10 degrees (f) more than the ISO, you will thin it out so it's viscosity is much closer to the ISO's. The purpose of the hose heat being in the middle, is to help maintain the Increase temperature on the resin, but not allow the ISO to get as hot as the resin. This would be a great set up, IF the hose sensor was in the resin side of the hose... Theory #2 Set the HOSE and the ISO 10 degrees (f) lower than the RESIN. This has the same idea as theory #1 but takes into account the safety factor and the wear on the hose (this is a good thing). The problem with having the hose hotter than is ISO side is all because of the sensor. From the factory, the sensor is located in the ISO section of the hose. If the hose heat is set to the same as the ISO preheated there will be no issues. It will be able to maintain the chemical temperature easily, by sending pulses of 40 amps through the hose, with little to no issues. If the hose is set higher than the ISO preheater, it will constantly be sending power through the hose telling it to heat the material. To do this the machine must send constant 40 amps of power through the line to try and increase the temperature of the ISO. If 3 amps can kill a person imagine what 40 amp of constant power will do! Sadly people have older beat up hoses. With these hoses, t's not uncommon to see a bare wire here or there throughout the hose. If this wire touches metal it will arch (potentially weld itself) and can start fires, if it touches water it will charge it and shock anyone connected to it, if you touch it your muscles will contract and not be able to let go...potentially killing you. Setting the ISO and hose temperatures the same will avoid these safety concerns. Instead of the constant power going through, it will be quick pulses, which can still can still has its risks, but will now only give you a quick shock, instead of a potentially fatal one. Matching these temperatures will also allow your resin to cool off a little, bring the viscosity back up and allowing for a slight pressure difference on you gauges. Theory #3 Set all the temperatures to the same. This will cause roughly 100-150psi difference in the gauges. Yes it is a difference, but not one you will really see in your foam (assuming pressure are set correctly) Out of these three theories I'm a fan of #2 and #3. Because of the extra wear and safety hazards of theory #1 I would highly recommend staying away from this! Perfectly balanced pressures are not worth the risk of potentially killing or severely hurting someone! When it comes to setting up the pressures, that part is pretty easy. Pretty much all material manufactures would like their foam to be sprayed at around 800-1000psi AT THE GUN. The hose will always have some pressure lose as the material runs through it. A good rule of thumb is 1 psi per foot. If you have 200 ft of hose, you should set you machine at around 1200psi so you can get roughly 1000psi at your gun. Increasing the pressure and spraying at a high pressure does not exactly increase the output of the material, it simply increases the aggressiveness as it leaves the gun. This set up will cause more overspray and blow back. If you want to increase your output, use a different chamber. There are many guns that are currently on the market for spraying foam. There are three main guns for a reason. These three main guns are the Probler P2, the Fusion CS and the Fusion AP. Each has it's own advantages and disadvantages. I will give a quick explanation on each gun, so you can find out which one is best suited for you. Probler P2 The Probler P2 gun is often referred to as a P2. This gun was created by a company called Glas-Craft. This company no longer exists. It was purchased by Graco back in 2008. Because of this, every year Graco increases the pricing in this gun, making the parts more and more expensive. Usually companies will supply parts for customers like this for 10 years after a buyout. Hopefully this stays a popular enough gun that Graco doesn't discontinue it in 3 years. This is a major reason for a lot of people switching over. This gun has a really nice spray pattern, which you can slightly adjust (using a nut driver) so you can have some control over it. The way the material enters this gun is from over the top. Each line is connected to a simple ball valve, which is attached to a "removable block" which contains the side seal. Each side has its own separate block is easily removed (by removing two screws) so you have easy access to inspect the side seals, as well as the chamber's sides. The chamber itself is made up of two separate pieces. It contains the mixing chamber, as well as an insert. This allows you to quickly change from a normal pattern, to a wide pattern (unlike the next to guns) This gun needs multiple tools to disassemble and put back together. P2 Conclusion: Because of the easy side seal removal, spray pattern adjustment, as well as two part chamber, it makes this a very nice gun. The down side to this gun is It has a lot of parts, which seem to be getting more expensive by the day. Making it a very costly gun to operate, as well as a little harder to rebuild (but still not to bad). Also there is no way to test the gun to make sure all the seals will work properly after its rebuilt. If there was something you missed (such as scratches or a damaged/pinched oring, you will be rebuilding it all over again. Fusion CS The fusion CS gun is a unique gun. It was designed to have a "special" fluid squirt out through the chamber every time that gun is triggered. This fluid keeps the gun from plugging up and crossing over, if used correctly it really helps on how often the chamber needs to be drilled out. This gun was also the first truly adjustable gun that was released to the market. At the back of the gun there is a dial you can adjust very easily (all you need is your hand). This simulates different chamber sizes while spraying, all from using the same chamber. You can either spray wide open on large surfaces, or dial it down to do some more detailed work. All with the turn of a knob. Finally the major advantage to this gun is the light weight. It is much smaller in design and about lighter then your average gun (by feel anyways. Graco's manual says its .1lbs heavier than the AP gun) which makes a huge difference after a day of spraying. As far as parts cost for this gun, it's middle of the road. Still a little expensive, but if everything works the way it should, there should be little maintenance on it. Also if there is any issues with the front housing, it's easily taken off and an new one out on. This will get you up and spraying again in left then 5 mins. All the tools you need to rebuild this gun is a 5/16 nut driver. The down side to this gun is really one of its biggest advantages. The special clear shot fluid. When this is working properly it works great. When it's not, it can be a nightmare. As a sprayer you really need to pay attention to patterns, as well as making sure you have clear shot coming out after every trigger. If you don't, the chamber will plug up a lot and eventually cause the gun to cross over, creating a lot of downtime. The chambers in this gun are just one piece. This makes the complete chamber cheaper to purchase, but causes you to pull the front end apart every time you want to change from a normal pattern, to a wide pattern. Like the P2 gun this gun has a lot of parts to it which adds the the rebuild time. Also like the P2 there isn't any good way to check the gun to verify that all the seals will hold after a rebuild. One of the ways this gun was made "lighter" is because of plastic parts, as well as smaller parts. This makes this a very delicate gun. You can not drag it around like you can with the other two. It's best to carry around, so it doesn't break on you. CS Conclusion: This is a good gun, with some great options but is only for experienced sprayers. Handing this to someone new while make them frustrated, and hate the gun. If you are a new owner operator, I'd shy away from this gun. I've seen this gun put guys out of business because of the issues with it (of course there were other things, but issues with this gun really hurt their reputation). Fusion AP The Fusion AP gun has been around longer then the other two for a reason. It's very easy to work with. It's the best gun to put in the hands of a new sprayer. Like the CS gun, the AP gun has a quick and easy to remove front housing, limiting downtime from a front end issue. This gun also has a one piece chamber, causing you to swap it out ever time when you want to change spray widths. Out of all of these guns this is actually the cheapest. It's cheapest to purchase as a whole, and it's the cheapest for spare parts. If you look at how many parts there are to make this gun operate, you will notice it has the least amount of parts. In a perfect world all you need is a nut driver, just so you can unscrew the coupling block from the gun. Once it's off you should not need any tools (but it's a good idea to have a small flat screw driver, and a small adjustable wrench on hand) The disadvantage to this gun is its weight. It's the heaviest gun of the three. Some people find it bulky. AP Conclusion: This is the most popular gun on the market for a reason. It's the easiest to use, it's the easiest to rebuild, and surprisingly it's the cheapest. This is a strong gun which can take being dragged across the floor (but still not recommended). You can put it in the hands of a pro or a rookie, and they can both easily use it. Downtime can be only mins, as long as you have a spare complete front end. One of the best parts about this gun, is being able to check it to make sure the seals are all working good, before putting it on. This eliminates the potential for a lot of head aches, as well as downtime. Over all Conclusion: 1) Taking everything into account (as well as personal experience), I would rank the Fusion AP as the best gun on the market. It's cheap and easy to use. 2) Runner up is the Probler P2. It can have a very nice spray pattern, the adjustment, and two part chambers are nice options for it. But sadly it's the cost of this gun which hurt it the most. It's not a Graco gun, because of this, they will soon be making it obsolete. They are trying to make everyone switch guns by pricing it out of the market. If you really want to use it, it will cost you. 3) Lastly is the Fusion CS gun it has great ideas, and features, but is almost to fancy for real life. I wish I could have ranked this gun higher, but It needs a lot of attention to detail while using it. If you have one and are making it work good for you, congratulations you are one of the few! Enjoy it and keep doing what you do. There is always a battle between how you should be cleaning your guns. Should you use solvent or shouldn't you....
I will give you the facts on both sides of the battle. I will start with the using solvent first. In the end it's your choice on how to clean everything. Solvent Pros If you select the right type of solvent (there are only a few out there that work good) you can disassemble your guns and just let them soak (for days) in the solvent. This will break down any reacted foam, make hardened ISO turn gummy, as well as swell up any non solvent friendly orings making them easy to remove. If used quick enough they can slowdown chemical reactions adding helping for a quicker cleaning process. Solvent Cons It will take days for the solvent to break down the materials, tying up valuable parts for some period of time. Most people think the solvents works instantly to soften up and breakdown the material. This isn't the case. It often leads to just wasting solvent. The fumes from the solvent will turn anything not solvent resistant soft and can damage it. Not to mention that they are very unpleasant to smell while working with them. A mask should be worn. You shouldn't keep solvents in the back of a truck. They should only be used at a shop. As mentioned about the fumes will eat away at anything not solvent resistant. The solvent does not clean the parts for you. It just soften the material on them. It is up to you to still dig at the material to remove it from the parts. This can lead to scratching of important surfaces costing a lot of money in the end. Solvent is expensive. Usually $400-500 for 5 gallons. No Solvent Cleaning So now you have a question. How to you get the foam off without using solvents? Would I not still be digging at it potentially damaging it? Yes and no... As some of you may have experienced an easy process you can do to clean a gun spotless all without having to do a lot of work. Boiling it in concentrated prestone antifreeze. I will be using this method for the pros and negatives of the no solvent argument. Boiling Pros It takes at most maybe 20 mins of actual work to turn a crossed over gun into something that is spotless. You never have to use tools which can scratch up you parts to clean them. You will clean out all the little pathways in the gun with out leaving any hardened residue on the walls. Cheap to do. All you need is an electric deep fryer, and maybe 2 containers of prestone. This will cost around $120 and you will get probably 10-15 boils out of the prestone before it needs to be replaced. At that time it's just $15ish for another jug of prestone. Boiling Cons Must be done in a well ventilated area. The fumes are very bad for you. Do not breath them. Depending on how dirty your guns are when you put them in to boil. You will have to change the prestone (you can usually get 15 boils or so out of it, if you do a quick clean of the gun prior to it the antifreeze will last longer) It is flammable. If it catches fire it doesn't do anything for you except let off bad fumes. If you use this method only use an electric deep fryer. My Personal Preference? Use as little solvent as possible... If any. If you really want to use it, only use it to soak parts back at your shop. This will loosen the foam so when you boil the parts it will not take as long. Also only boil parts using an electric deep fryer, as well as doing it in an area which is properly ventilated. After the parts are cleaned, pull them out and cool them off. After they are cooled off wipe them of to remove any residue, while inspecting each part for damages. If done right, you will be amazed at how quick, easy and clean the parts come out! Over the last little while I've been asked about what should a company really have for spare parts, as well as what they should do for some preventative maintenance. Let me start with the spare parts. This is really broken down into two sections. There are parts you should have on each truck, as well as parts you should keep tucked away at the shop. Truck spare parts: 2 x complete guns 1 x complete front housing (with chamber) 1 x spare parts kit A spare parts kit should include the following: 2 x sets of orings 1x a side check assembly 1x b side check assembly 1x a side seal cartridge 1x b side seal cartridge 1x chamber (at least one chamber, if not two) Keeping these parts close by, will help you keep spraying. To some it may sound like a lot of money to tie up, but it's a small price to pay to keep spraying. Keep in mind you are only making money if you are spraying. Think of these items as an insurance policy, if it helps. It's an insurance policy that you will actually use some day. When that day comes most of these parts will pay for themselves with the cost of prevented downtime. Not to mention in reputation. A company that promises a job will be done for a set time, and constantly delivers that promise, will become more respected. Respect equal more money in your pocket. At the shop spare parts: 10 x 80 mesh filters for the Inlet of your machine (most places sell these as a 10 pack) Spare filter washers (these stupid things never seal right after you check the filter) Machine pump rebuild kit Feed pump rebuild kit (spare pumps for each side is not a bad idea to have either) 2 x springs for the top of your feed pump (if it's a stick pump) 1 x heated whip 1 x gallon of TSL (this is throat seal liquid. Any type of plasticizer will work) When it comes to PM work it's broken up over time. This pm covers the actual foam equipment. Gennys, air dryers, air compressors, and fresh air filters are not included in this. Please check you manuals for their requested PM. Daily: Check you hose for wear spots. This is easy to do when you are pulling the hose out and putting it back in. If you have recirc lines that you use, open the ISO side for a little bit. Letting fresh material move through the line stops it from hardening up, and building up residue on the walls of the line. Give your lube cup a shake. Make sure it's not hardening up in there. Monthly: Check a and b Inlet filters Replace the TSL in the line cup (keep an eye on how "worn" 'it is. If it's getting crusty and brownish there is a good chance you have a leak in your ISO pump. If it's just white and chalky that's normal wear. You want to swap timeout before it thickens up to the point of plugging the system. Open the the air motor on your stick pumps and inspect them for wear, as well as wipe off old grease and re grease using white lithium grease. Some people like to swap guns every month as well. They will put in a newly rebuilt gun and set the other one up for rebuild. You should be able to get 2-3 months out of a gun easily. But replacing it before it's wear out date is a good way to prevent onsite downtime. It's also good to have a look at your guns before they fail. This will let you see how parts are wearing, before failures. Before winter/summer: Winter time can be a pain in colder climates. It can be hard to maintain a constant hose temp. This in turn makes the foam inconsistent and can be a headache to work with. In warmer climates this happens in the summer time. The best way to prevent this is to make sure your hose is insulted properly, and well wrapped. The insulation is key in maintaining a consistent temp. The wrap is a major part in keeping the insulation protected. I will get into ways to wrap hose in a future blog. Once a year: Every one has a slow time (most of the time is in January). It's during this slow time I would recommend going over the equipment in detail. I would check electrical connections, blow dust out of cabinets, give the machine a nice "spit shine". It's also a great idea to take this time and rebuild your pumps. You know the next rush is coming and there is nothing worse then having to push jobs away because you need time to rebuild pumps. Timing the rebuild of these pumps will prevent unwanted downtime. Controlling your density is probably one of the hardest things to do in the world of spray foam. It will require the correct material for you (get into that later), correct spray technique, correct substrate preparation, correct mixing pressures, correct temperatures, as well as correct gun maintenance. If all of these things are perfect, the result will give you less then 2lb (1.8-1.9) density foam. Let's break down each of these things, and how they can affect your density. Correct Spray Technique: There is no 100% rule for spray technique. Everyone sprays different. Up, down, side to side, swirl, and anything else you can think of can all get the same results, IF done properly. What you need to keep in mind while spraying, is a few simple things. These will help keep your density as low as possible. When spraying you want to make sure you do the maximum thickness of pass, which you are allowed to do (in Canada this is two inches, in the USA there is a product that can be sprayed 3 inches with no problems). Spraying the maximum thickness will eliminate pass lines within your finished product. Each pass line is a thin layer of very dense material. This can account for upwards of an extra .1-.2lbs per cubic foot. You can see how this adds up and can easily take a good density foam and quickly make it a bad density. The next thing to keep in mind is to always spray 90 degrees to your substrate. If you do not, you can be "pushing" the foam as it rises, this can create waves in the foam, which have the potential to have skins on them. These lite skins can add up and increase the density (they can also damage cell structure). While spraying at 90 degrees you want to work your way down (or up) the cavity. While applying the wet foam you want to cover the fresh product by 80% and have 20% going on fresh substrate. You want to be sure to move back and forth quickly so your material is just laying into the surface of the fresh rising foam, and not actually pushing it around, or penetrating it. It's better to go back and forth many times to build up thickness, then it is to go slow and create waves in the rising product. In a perfect world you would love to do the cavity in one motion from top to bottom (or vice versa) "riding the wave" at a consistent speed all the way down the cavity.. This would eliminate and breaks, where a skin will be created. Doing this will take a lot of practice, and chances are, will still need a few touch ups around the edges. Correct Substrate Preparation: There are a few rules when it comes to spraying on something. You want to make sure it is clean, as warm as possible, dryer the better (less then 18% humidity), and free from oils. Foam needs heat so it can react. Having a nice and warm material is a good start, but having a warm substrate is the next thing you need, to get great density. A cold substrate (like concrete) will act as a heat sink. It will pull away the heat from the reaction. I'm sure many of you have seen the foam stay "wet" and get poor rise from it when spraying on a cold surface, that is the reason why. To prevent this there are a few tips. One easy one is following the sun. Spray onto the walls the sun it hitting. They will be warmer then the walls in the shade. Another trick is to put heaters in the place where you are spraying. This leads us to the next part... keeping the area dry. It's important to remember to spray on dry materials. Water and foam hate each other. You will have foam falling off the walls if the substrate is to damp. Wood and concrete can hold moisture for a long period of time. It's best to check them with a moisture meter to make sure they are less then 18% humidity. If they are over, you can not spray. Dehumidifies may be a good investment if you run into this problem a lot. You need to be careful when you are heating a building. A lot of people use propane heaters. This is terrible. Propane gives off a "wet" heat. This creates a lot of extra unwanted moisture in the spray area. Its best to use diesel heaters. They give off a very dry heat. Correct Mixing Pressure: It is important that you have foam that is being mixed properly. Poorly mixed foam can relate in a lot of issues, one of which is bad densities. Most chemical manufactures tell you that your best mix of material will come at 800-1000 psi at the gun. So your machine should be set to around 1150-1300, because of the pressure loss in your hose. At these pressures you should be able to eliminate any "marbling" that can take place in your product. All high pressure foam systems are mixed using direct impingement. This means the two sides are colliding at high pressures within the mixing chamber then being forced out the tip, on to the substrate. A good chamber will give the foam a little swirl within the chamber, to get better mix. If you feel you gun pulsing as its spraying or you are getting raw material shots, you chamber may be worn out, or machined incorrectly. If all you seals are holding and working correctly in both your machine and your gun, you should be able to easily maintain the 1:1 mix ratio you need for good foam. If they are bad, and you have leakage and you may be actually getting off ratio foam. Most of the newer machines in the market (within the last 8 years or so) will shut you down before this gets to bad. Once the pressure get to far off, it will shut down letting you know there is an issue somewhere. You want to keep your pressures as close as possible. I would say anything within 250 psi of each other you are okay. If it gets worse then that, I would start looking at why. I say 250psi because you are using mechanical gauges which have a tolerance on them, as well as heating up two materials with different viscosity (that's a different conversation). Correct Temperatures: This is a fun one to try to perfect. You may be tweaking temps all day in some cases, other days you can set it and forget it. Every manufacture will give you guild lines for where to start to set your temps. Regardless of what you are told, it's up to you in the field to find the best temps to run at. You will know when you found the best temperatures because when you spray your foam on a warm substrate, it will stay "wet" looking for almost a second and then forth up and look like the finished product. If the foam is staying wet looking longer then that, or is dripping, it is too cold. Now if you pull the trigger and are seeing foam that is already the color of your finished product and never looked wet, it's too warm. Your foam is reacting before it hits the substrate. This will created small balls of foam that will punch through the rising foam damaging cells, as well as increasing density. Your gun will also start to plug up a lot, and loose it's pattern, if the foam is too warm. Some days finding that sweet spot is hard to do, and will change your set points through the day. If you can find the sweet spot, you will thank yourself for it once your set is finished, and you get your paycheck. On a side note, adjusting temperatures can also balance out your pressures a little bit. Some people like to run their resin 5-10 degrees hotter then the ISO side. The theory behind this is that it will thin the resin a little more allowing the viscosity to become closer, allowing the back pressures to be more equal. Keep in mind the hose heat temp is red from the ISO side, and the hose should never be used as a heater, just a device which maintains a temperature. Saying that it is not a good idea to have the hose temperature warmer then theniso preheater... Correct Gun Maintenance: Being able to maintain a good pattern is key. If your pattern is all over the place it can be hard to control from where the foam is going. You may be wasting it by putting it on the studs or adding extra skins at the sides or just creating a lot of over spray. Drilling out your tip and having a clean air cap in good condition is key for this. Correct Material for You: This is a very touchy one. Everyone has their favorite material because of a supplier, sales guy, tech support, kick back, cost, or based just on the performance of it. It's important to work with a material that you can control. being able to control it is a huge advantage for you. It will make it nice and easy to dial in your set points on a daily basis, as well as control the rise, so you do not get unwanted skins. If you are buying (using random numbers) the material for $2400 a set but it is a pain to work with and you are averaging 2.7 lbs for your density, is it really that cheap? Let's find out. Spraying at that density will give you 4444 board feet a set, which works out to 54 cents a board foot. Now let's say you have a material that is $2800 a set and easy to work with. Because of that you are getting an average of 2.2 lbs for you density. That's 5454 board footage per set. That works out to 51 cents a board foot. The "more expensive" foam is actually 3 cents cheaper to spray per board foot! So if you sprayed 5454 board feet at 54 cents, the set would cost you $2945.15 to get the same yield out of it. Even though you are paying $400 more a set to start with. In the end not only will you save money, but you get a better, more predictable product (not to mention less clean up) which you can make more more money off of a single set. Also keep in mind a happy sprayer will be more productive then one that hates the material he is working with. When choosing you foam it's important to keep a few things in mind. 1) Actual board footage costing (what you actually get, not what a supplier tells you). 2) Ease to work with 3) Support. You want to have a company that will work with you so you can get the best densities possible from their product. If they can't show you a low density product, chances are their product is difficult to work with, which in the end will cost you money. A good company will send someone to see you, so they can teach you how to use their product. Also when times get rough, you want to make sure your supplier can get you the answers you need. You want to have someone in your corner that can get you weird information customers/architects/inspectors demand. Another thing a lot of times chemical companies will pass issues off as equipment problems and not their issue. Equipment companies will pass problems off as material problems and not their issue. Having a supplier that say he will look after you means they have a solid understanding of the equipment as well. They should be able to explain your problem to you and why you need a certain part. A lot of times companies just throw parts at a problem, until they find one that works. This can be veru expensive. Remember you as a customer always have to right to question things. It's always best to question what you do not understand. That is the only way to learn and grow! |
Author:
|




 RSS Feed